PS5 SSD upgrade: how to install it
PS5 SSD upgrade step-by-step installation instructions with the heatsink
Our updated PS5 SSD upgrade guide will show you how to expand your console’s storage faster than Sony’s console sells out during the latest PS5 restock.
If you’re one of the more than 400,000 people I’ve helped get a next-gen console, then you should install a PlayStation 5 SSD to increase your storage capacity, as it’s one of the best PS5 accessories you can buy. It’s a must-have after you get more than a few of the best PS5 games.
Upgrading your PS5 SSD with this step-by-step process begins with buying a proper PS5-compatible M.2 drive and ends with formatting it for use. If you’re unsure which SSD you should buy, check out our best SSD for PS5 guide.
The process is the same regardless of whether you own the PS5 Disc vs Digital, as both consoles have the same amount of internal storage.
Things to know before the PS5 SSD upgrade:
😃 825GB: the internal PCIe Gen 4 M.2 NVMe SSD of PS5 Disc and PS5 Digital
😅 But only 667GB of that is user-accessible, meaning you’ll be installing and uninstalling games constantly when you amass even a small library
🙅♂️ External SSDs and hard drives can’t run PS5 games – they aren’t fast enough
🛍️ You can buy a PS5-compatible M.2 SSD, typically at a 1TB or 2TB capacity
🚫 There are 4TB PS5 SSDs, but I haven’t seen prices that make them worth it
😬 Installing a PS5 SSD looks harder than it is
🪛 You’ll need a Phillips-head screwdriver and a PS5 SSD (some options below)
🥶 Use a heatsink – buying a PS5 SSD with a heatsink included is easier, even if it costs a touch more. I’ve seen people try to install a PS5 SSD without a heatsink for a hot minute, but it could degrade your SSD over time without proper heat dissipation and isn’t recommended
📜 Installing a PS5 SSD won’t void your warranty (I get this email question a lot)
🤗 It adds storage to the internal PS5 SSD; it does not replace it – you won’t have to delete and reinstall games
1. Buy a PS5 SSD
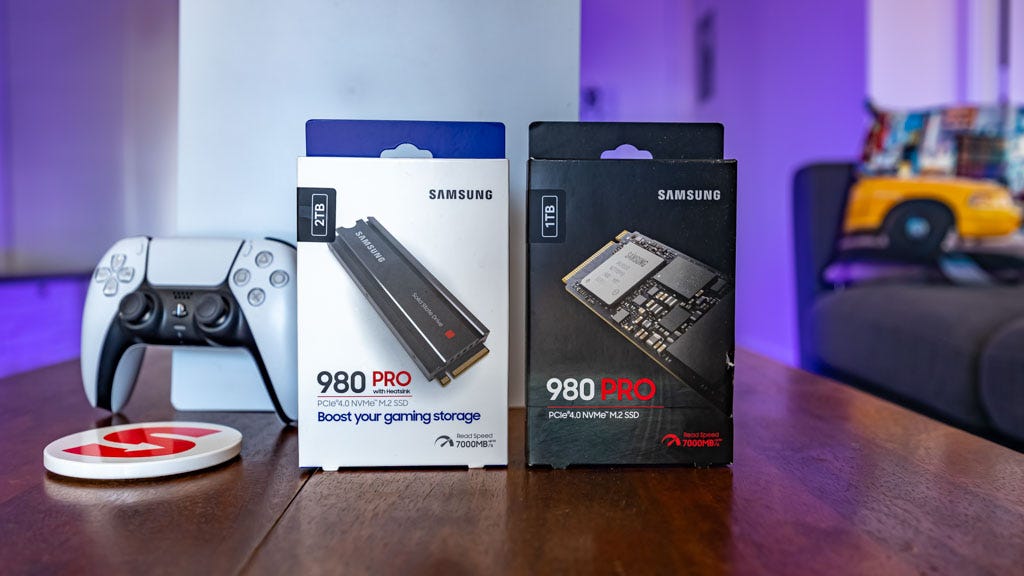
Picking the right M.2 SSD for the PS5 is hard because there are many options from third-party vendors. The specs also vary compared to the sole Seagate SSD sold by Microsoft for the Xbox Series X. You’ll need an SSD with a 5,500MB/s sequential read speed or faster and one that uses the PCI-Express interface, not an M.2 SATA SSDs.
If you’re asking, “Matt, what are you talking about?” just buy one of these PS5 SSDs:
Samsung 980 Pro SSD with Heatsink – 🏆 the one I use in this guide
WD_Black SN850 SSD with Heatsink
Ethics disclosure: The Shortcut is supported by you. I may earn a small affiliate commission when you purchase through some of the links.
I recommend a PS5 SSD 2TB or 1TB. There are 250GB and 500GB options out there, but those aren’t worth it, and 4TB PS5 SSDs are priced astronomically. You’ll be able to fit all of the monthly PS Plus free games onto a 2TB PS5 SSD just fine.
2. Remove faceplate to access PS5 SSD slot
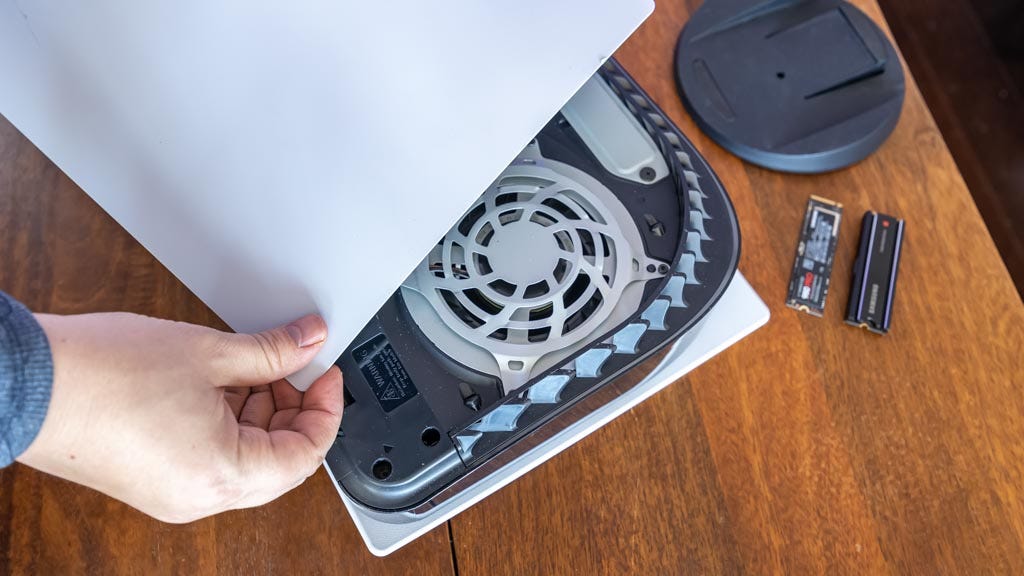
You’ll need to get inside your PS5 (don’t worry, this won’t void your warranty), which means removing the console from the stand and taking off the default white faceplate on the rear side (without the PlayStation logo).
Put your unplugged PS5 on a flat surface with enough space (not on top of your narrow media cabinet next to your flat-screen TV).
Take off the faceplate by gripping the edges of the backside of the PS5 (this is the side without the PS5 logo; on PS5 Disc, this is the side with the disc drive). Lift up and slide downward gently. It’ll require more force if you don’t have the right motion, but it should still pop off with a little work.
Remember, it’s a lift-up-and-slide-down motion.
3. Remove the expansion slot cover plate
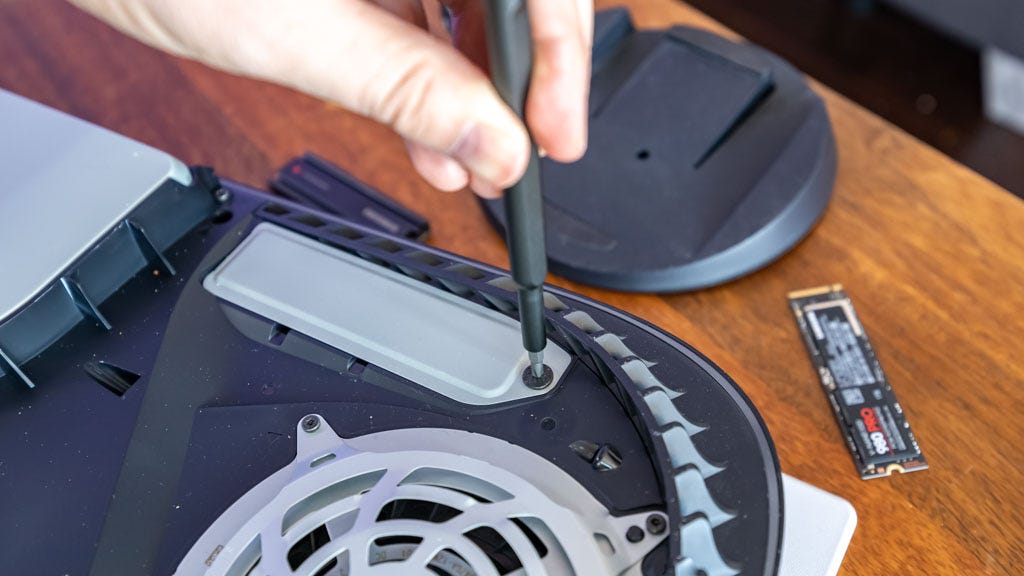
There are two screws you need to remove before installing the PS5 SSD in the long, narrow expansion slot bed. The first screw secures the expansion slot cover plate.
💡 Pro tip: Please don’t lose this screw when removing it from this plate with a Philips-head screwdriver. In my first test, I dropped it in the nearby PS5 fan and had to fish it out – that’s unfun, let me tell you.
Lift the PS5 expansion slot cover plate to reveal the second screw.
4. Remove the SSD screw and spacer
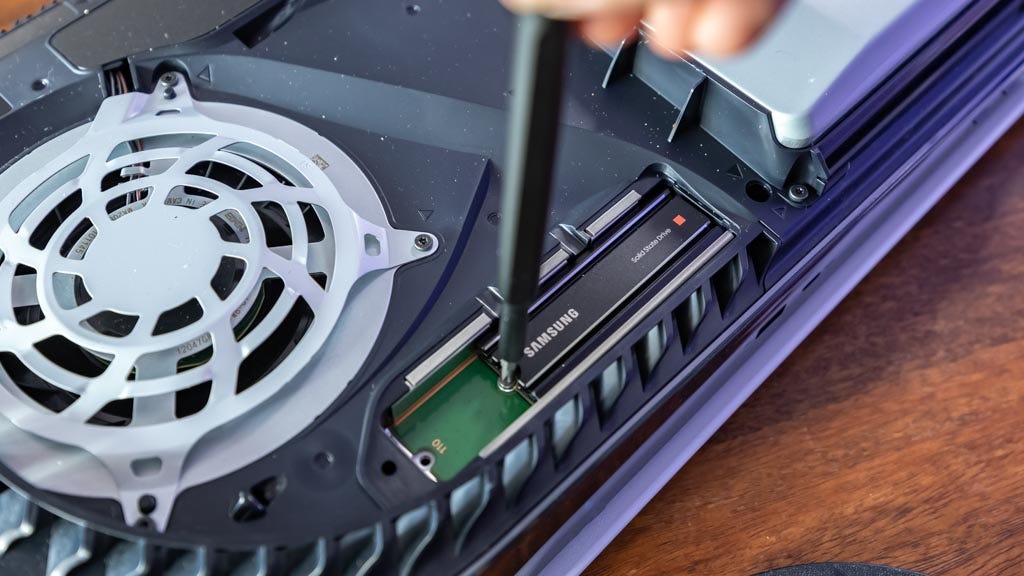
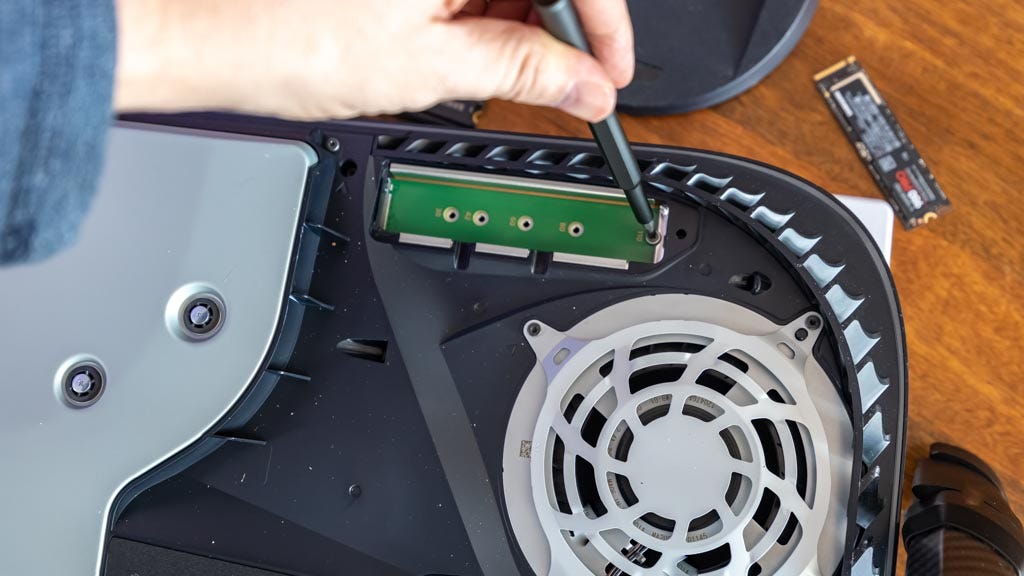
The second screw is located inside the bed of this expansion slot and it has a spacer underneath it. Locate the screw at the top of the green area, where it says 110 in white lettering. The green area has five holes for various SSDs of different sizes – maybe something for the future as more PS5-compatible M.2 drives launch.
You’ll need this screw and spacer to secure your PS5 SSD in the slot. It’s just hanging out near the top for this purpose and has no functionality before you install your PS5 SSD. Hang onto this screw to complete Step 5.
5. Install the M.2 SSD into your PS5
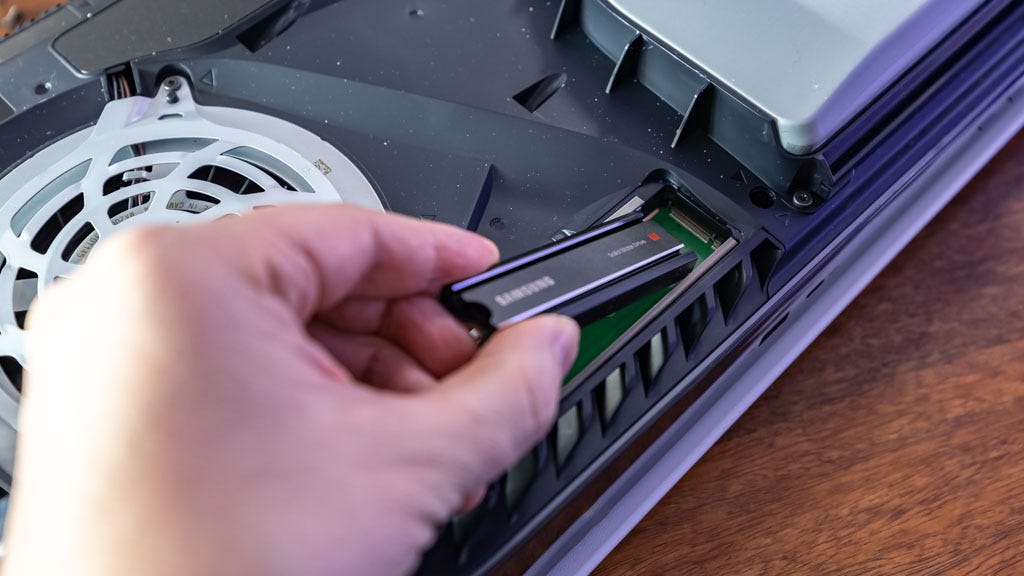
If this was really a one-step process, Step 4 would be the step: line up your M.2 SSD with the PS5 expansion slot circuit board, and you’ve done it.
💡 Pro tip: It’s best to go in diagonally, as shown, before firmly pressing the SSD in. You’ll know when it’s locked in – I had to lift up the SSD before it sank into place because there’s a bit of a lip along the bottom. Scrapping the bottom floor of the green area (what I did at first) didn’t work. Lift a little.
6. Screw in the PS5 SSD with the spacer
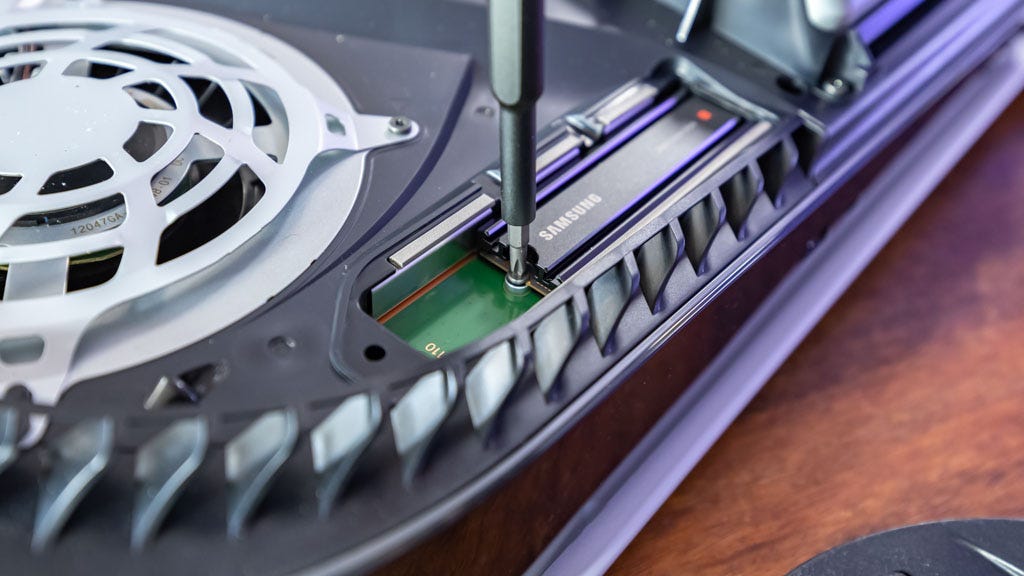
Once the pins are aligned, forcefully rest the PS5 SSD flat in the expansion slot bay and put the spacer underneath the SSD screw hole. Tighten the screw through the top part of that same hole.
Your PS5 SSD upgrade is complete. Now it’s time to put the PS5 back together again.
7. Replace the expansion slot cover
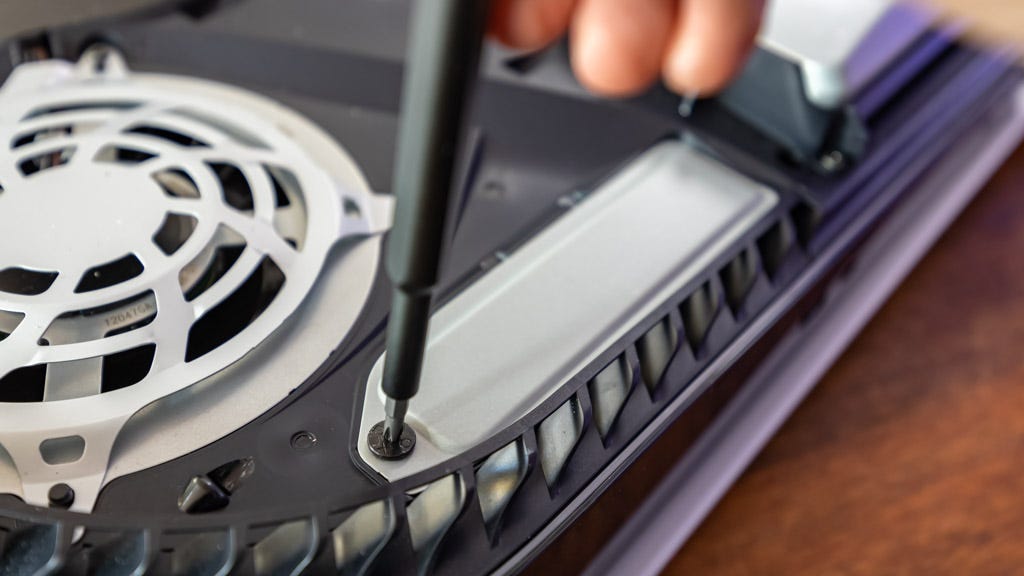
I’ve seen people try to skip this step, and that’s a major no-no. Reattach the thin metal expansion slot cover over the top of your newly installed M.2 PS5 SSD. Use the first screw you definitely didn’t drop in the PlayStation 5 fan to secure it.
Why do people skip this step? Because it seems like the PS5 SSD with the heatsink is big enough for the expansion slot and many people suspect it doesn’t need to be reattached (some people have bought junk third-party heatsinks that they claim won’t fit into the expansion slot, which is why I suggest most people should buy a PS5 SSD with a heatsink included from the start).
Not reattaching the expansion cover slot is wrong, according to Sony. The company has said that the cover allows for negative pressure when the slot is closed off.
8. Replace the PS5 faceplate cover
Reattach the PS5 faceplate cover (it’s easier to reattach the faceplate than take it off). You never have to see that PS5 SSD ever again – until you need to upgrade to 4TB or more when you fill up your 1TB or 2TB M.2 SSD. (It’s what makes the new WD Black SN850 NVMe SSD for PS5 completely pointless.)
💡 Pro tip: I have seen a 4TB PS5 SSD for sale, but it’s not worth buying today. Prices start at $600 without the heatsink, and faster M.2 devices could launch later in the console cycle, or if they stick around at their current speeds, they’ll naturally drop in price. You’ll want to save money for the forthcoming PSVR 2 and the new PlayStation Plus Premium.
9. Format your PS5 SSD
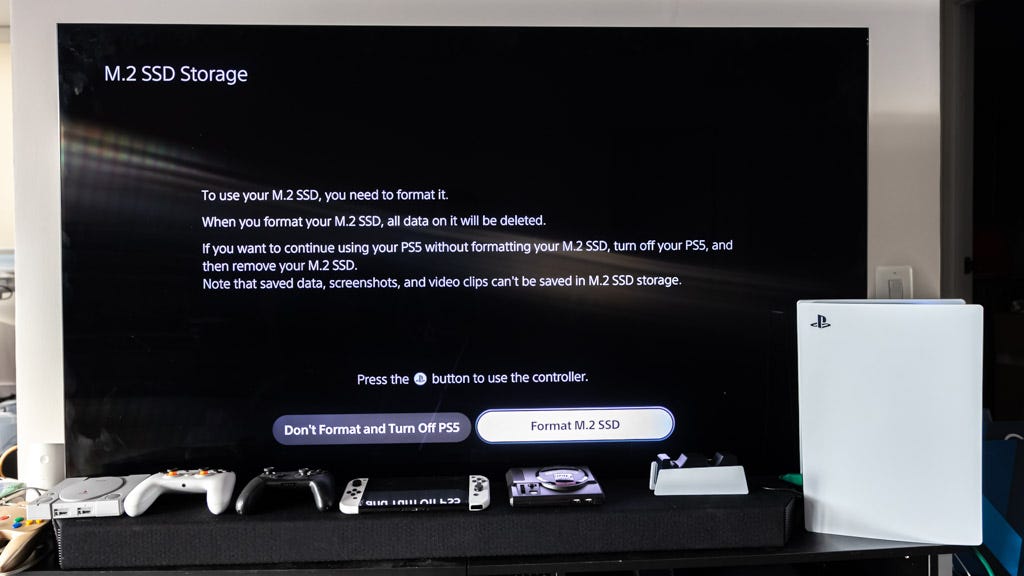
Your PS5 is back to normal. Plug it in (you didn’t skip the step in which I said to unplug it, did you?), put it on the stand, and turn it on. The PS5 will boot up and immediately greet you with an on-screen formatting guide.
⚠️ Caution: This formatting step won’t erase files on the internal PS5 SSD, but it will wipe anything on the SSD installed in the expansion slot the first time you use it with a PlayStation 5. This is another reason why it’s important to have a dedicated M.2 SSD for PS5 rather than one you were using previously in a PC.
10. Check your PS5 SSD space
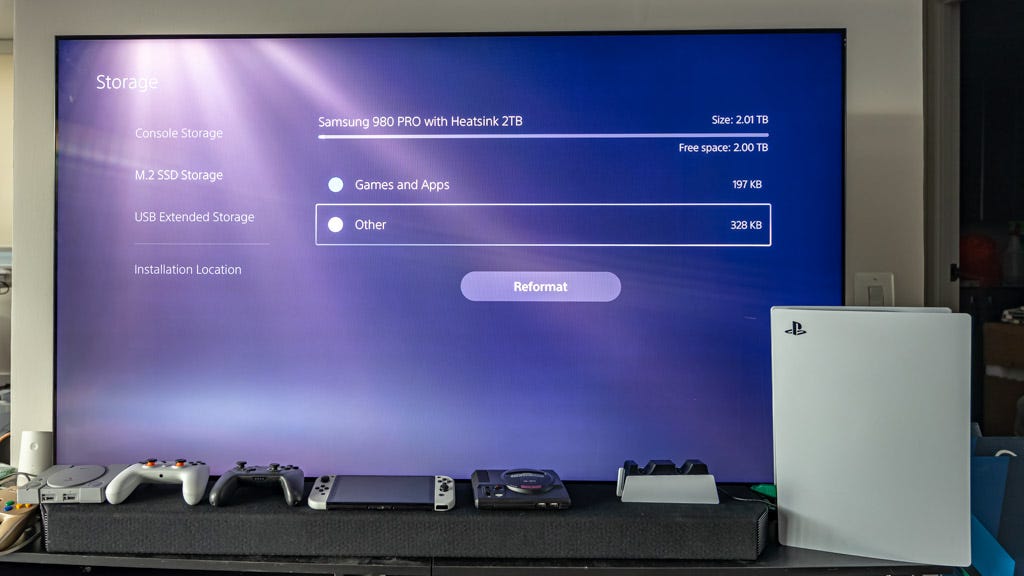
To check your storage space, go to Settings (gear icon in the top right of the main menu) > Storage > M.2 SSD Storage. You’ll see that there’s now a full extra 2TB of storage (with the recommended 2TB PS5 SSD, of course).
This PS5 upgrade experience is much more pleasant than installing and uninstalling and installing games again and again at the default 667GB – which I suspect is the worst PS5 “game” so far. You can focus on playing the best PS5 games instead, and dive into the 700+ PlayStation Plus Premium games list.
Samsung 980 Pro SSD with Heatsink – 🏆 the one I use in this guide
WD_Black 1TB SN850 SSD with Heatsink
Updated: December 12, 2022


I'll also add that if you already have an SSD and need a heatsink, Sabrent makes one of the best ones around.
https://www.sabrent.com/product/SB-PSHS/sabrent-m-2-nvme-ps5-heatsink-sb-pshs/
It's designed to replace the SSD heatsink and compartment cover. It has a massive dissipation area and doesn't require any drilling, wiring, etc. It also gets airflow from the PS5's fans. Available at NewEgg, Amazon, and their own online shop.