Best Nintendo Switch 2 settings: change these to get the most out of your console
It's worth turning on (or off) these Nintendo Switch 2 settings
👉 You can optimize your Nintendo Switch 2 experience by tweaking key settings for TV and handheld modes, focusing on display, audio, and system adjustments
😍 Ensure optimal visuals by enabling HDR, calibrating RGB Range, and adjusting screen size to match your 4K TV’s capabilities
🎧 You can also improve audio with the Pro Controller by disabling 'Lower Maximum Headphone Volume' for better sound output
🔋 Extend battery life and enhance convenience with features like 'Stop Charging Around 90%' and 'Maintain Wired Connection in Sleep Mode.'
Want to know the best Nintendo Switch 2 settings? You've come to the right place.
While most people will be happy with the out-of-the-box setup of the Nintendo Switch 2, more discerning users will want to tweak a couple of settings to get the most out of the system.
Some of the default options aren't the most ideal, which is why I wanted to share every setting I've discovered (and promptly changed) during my hands-on time with the Nintendo Switch 2.
These best Nintendo Switch 2 settings will apply to TV mode and handheld mode, as some options are specific to those play modes. Make sure you console is docked and in TV mode so you can adjust every available setting, as some are not available in handheld mode.
Okay, let's dive into the various settings menus to help you get the most out of Nintendo's new console.
Best Nintendo Switch 2 settings: TV and handheld mode
It's worth stating that I assume you have a 4K TV, preferably one with 120Hz support and HDR. If not, you can skip any settings that apply specifically to these areas.
Display
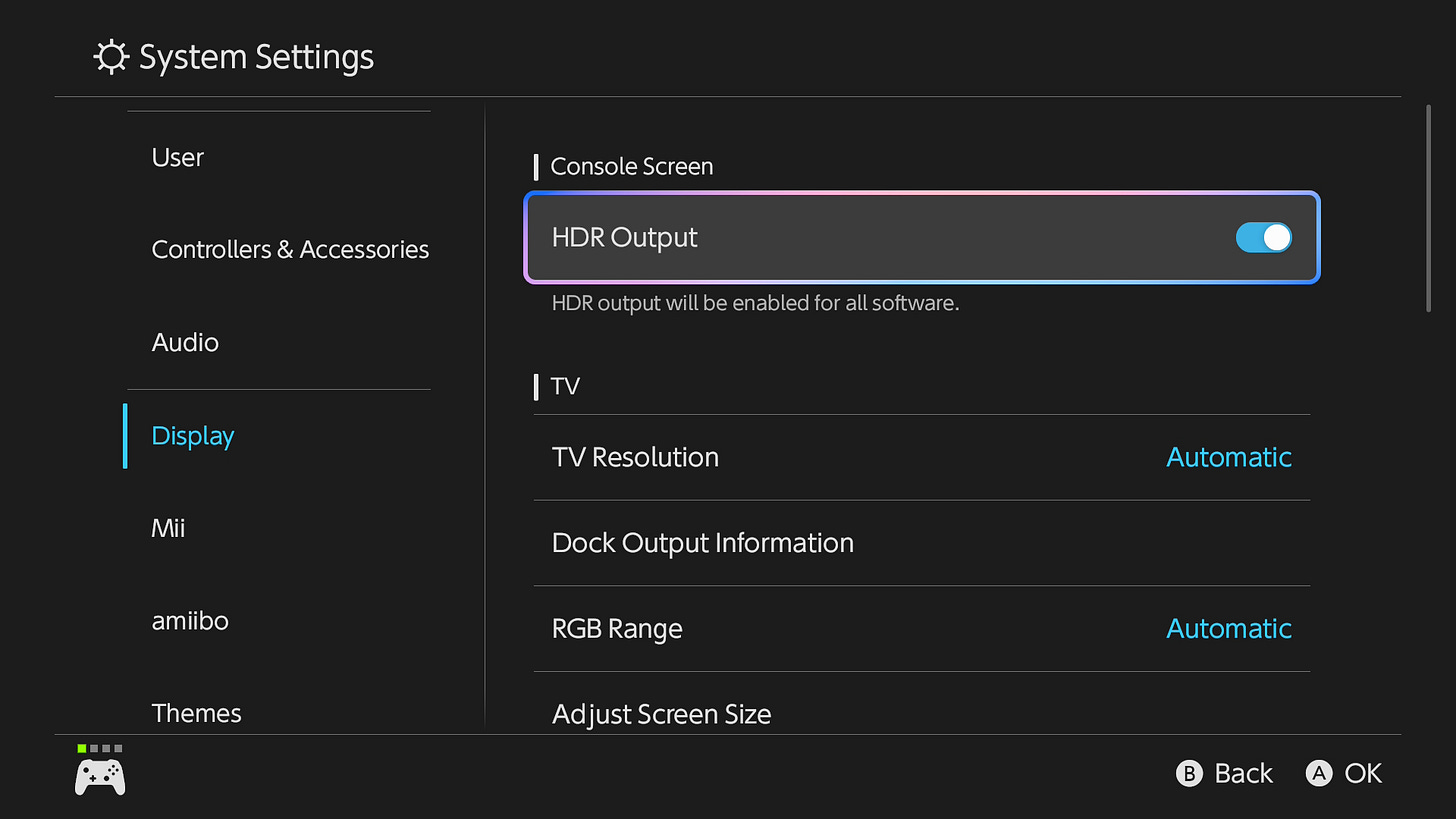
Perhaps the most crucial Nintendo Switch 2 settings to get right are found in the 'Display' submenu, so let's start here.
HDR Output
First, you'll find a toggle for HDR Output. This should be turned on by default as the Nintendo Switch 2 will recognize if you have an HDR-capable display. If it isn't, turn it on!
TV Resolution
While you might be tempted to switch this to your display's native resolution, it's best to leave TV Resolution set to 'Automatic'. This allows the Switch 2 to change resolution when necessary, such as when a game has multiple display modes.
RGB Range
If you have an HDR capable display, the RGB Range should be set to 'Full Output'. I found the Switch 2 defaulted to 'Limited Output', which made HDR look washed out. You can also try 'Automatic'. Make sure that your TV is capable of displaying Full RGB before turning this setting on. Older displays tend to work best with 'Limited Output'. If highlights and colors look crushed or oversaturated, stick with Limited.
Adjust Screen Size
This one catches a lot of people out. Make sure you head to 'Adjust Screen Size' so that the Switch 2's output matches the size of your screen. I can't tell you how many people I've seen with the dashboard zoomed in or with black bars near the edges. Just follow the onscreen instructions to ensure you're using every pixel of your display.
Match TV Power State
If you have a TV that has HDMI CEC support, your TV can turn on when you wake the Switch 2 from sleep mode. Switching off the TV will also put the console into sleep mode. It's super convenient.
120Hz Output
Another setting that is entirely dependent on the display you're using and will dictate whether you can play Nintendo Switch 120fps games. Turn this on if you have a 120Hz compatible TV or monitor. Remember: the Switch 2 can only display 120Hz at either 1080p or 1440p, but your TV will automatically switch resolution when necessary.
Auto Low Latency Mode (ALLM)
Most modern-day TVs support ALLM. If you're confused about what it is, ALLM automatically selects your TV's lowest latency mode, which is usually called 'Game Mode'.
HDR Output (this one's different!)
Like the PS5, the Switch 2 can remain in HDR mode, no matter what game you're playing. If you'd rather HDR only turn on when you play a HDR-compatible title, you can change this from 'Always Enabled' to 'Compatible Software Only'. Personally, I've never seen any downside to leaving HDR Output on. It also saves your TV from having to briefly switch to HDR mode each time a compatible game is played, which can be annoying.
Adjust HDR

If you have an HDR display, you'll want to ensure you've calibrated the Switch 2's 'High Dynamic Range'. Follow the onscreen instructions to get the most effective results.
Audio
Using the Nintendo Switch 2 Pro Controller's new headphone jack? There's a setting we need to toggle in the Audio submenu.
Lower Maximum Headphone Volume
This pesky setting is turned on by default to protect your hearing. But it's also the reason why the Nintendo Switch 2 Pro Controller volume is too low, at least for most headphones. Turn it off, and you'll have more volume to play with. Just take it easy on your ears, yeah?
Sleep Mode
Next, there's a setting we'll want to change in Sleep Mode.
Maintain Wired Connection in Sleep Mode
If you're using a wired connection, make sure you turn on 'Maintain Wired Connection in Sleep Mode'. This allows the Switch 2 to keep using a wired internet connection, even when in sleep mode, allowing downloads to start immediately. It consumes more energy, but I'd prefer my games to be updated as quickly as possible, even when away from the console.
System
Let's head to the 'System' submenu next as there's a feature we'll want to apply.
Stop Charging Around 90%

If you want to prolong the Switch 2's battery life, turn this on. When enabled, the Nintendo Switch 2 will stop charging at around 90% to optimize battery life. Yes, you might lose a bit of playtime in handheld mode. However, it's better to extend the life of the Switch 2's battery than slowly lose battery life forever over the course of time.
Album
If you love taking screenshots and video clips on Nintendo Switch 2, there's a setting you'll want to turn on if you like sharing your favorite gaming moments. You can access your Album from the Switch 2's home screen.
Automatic Uploads
Head to 'Album' and then 'Upload Settings'. From here, turn on 'Automatic Uploads'. This will send captured screenshots and videos automatically to the Switch app, which is far easier than manually sending them each time.
Up next: Best Switch 2 games 2025: 10 titles you need to buy
Adam Vjestica is The Shortcut’s Senior Editor. Formerly TechRadar’s Gaming Hardware Editor, Adam has also worked at Nintendo of Europe as a Content Marketing Editor, where he helped launch the Nintendo Switch. Follow him on X @ItsMrProducts.